These directions were written for someone using a desktop or laptop computer. Everything in this tutorial can be accomplished on a mobile device, but you may find menus and options are in a different place.
WordPress was originally developed as a blogging platform, while it’s grown to be a full fledged content management system, the blog function makes for a great news feed, you’ll be surprised how easy it is to update visitors to your page.
Once you’ve logged into your dashboard. Click on Posts, then on Add New.
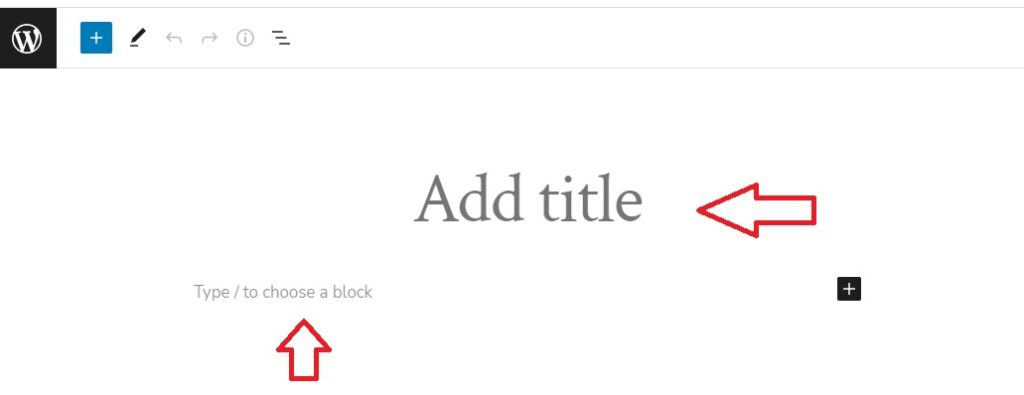
Now there are only two things you really need. A title, and your post. Click where the arrows in the following image indicate and just type in your text.
You can add more formatting and other elements to your post if you want, but it not required, one addition I highly recommend is setting a featured image. If the settings on the right side of your screen aren’t already displayed click on the gear in the upper right corner, scroll down and you’ll see a link to set your featured image.
Note: If the set featured image option isn’t available you might have a block in your post selected, just click on the white space in the margins next to your text and the correct menu should appear.
Finally, don’t forget to click publish in the upper right and poof your post is up and in your news feed!
This post was written based off an installation of WordPress v6.1.1 using the theme Go v1.8.0 With the Plugin CoBlocks v2.25.5.
These directions were written for someone using a desktop or laptop computer. Everything in this tutorial can be accomplished on a mobile device, but you may find menus and options are in a different place.
If you already have the Events Calendar Plugin installed in WordPress creating an event for your events page is quick and easy.
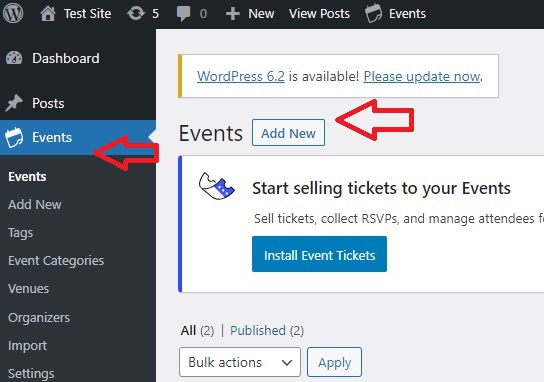
Login to your site dashboard. If the Events Calendar Plugin is installed and activated you’ll see an Icon on your left toolbar. Click Events, then click Add New.
You have many details you can add to your event, but you only need to add a few, I’ll list these in three parts: Required,Recommended, andOptional.
Required
Title
This can say whatever you want, but it can’t be left blank. An easy format might be band@someplace, but it’s strictly up to you.
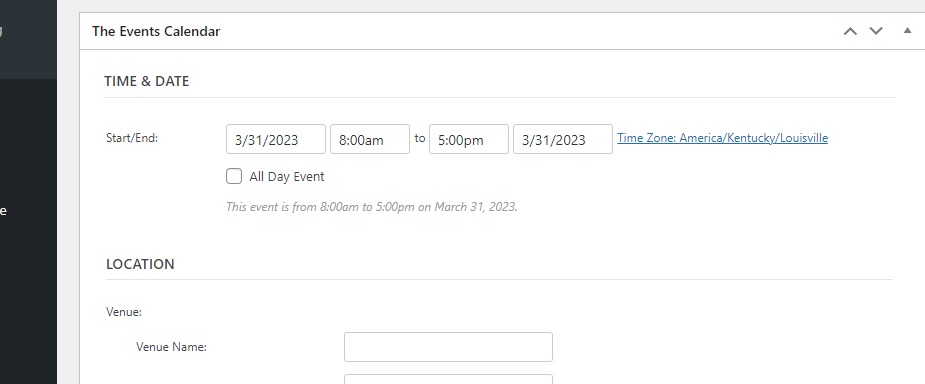
Time
Currently your event needs a start and end time unless you check the all day box. If you’re event doesn’t have an end time, you might note that in the description box.
Do not leave the end time blank. If you do the end time will default to the start time and your event will not appear in your calendar. I’ve made a recommendation to the plugin developer to change it but for now it is required.
Recommended
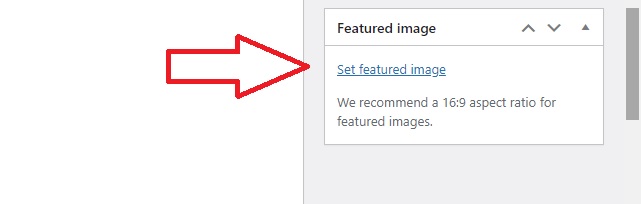
Featured Image
The bottom option on the right had side is set featured image, you can upload one or choose one from your library. A featured image helps your events page pop, and images can also help with search engine optimization (SEO).
Location
Filling in the venue address can be a bit tedious, but once you have done it once you’ll be able to select it again from a drop down. These fields provide several benefits. For starters those who want to attend your event can get directions directly from the event page, and this plugin uses something called structured data, and including these fields helps with SEO
Optional
Details
The blank field directly under the title can be used to give your users miscellaneous information. For example: Dogs Welcome, 21+, No outside food or drink, please don’t pee in the bushes.
Organizer(s)
Add information about the people involved in the event. You can probably think of this like the hosts section on facebook events. This might be useful if it’s a charity event and you want to provide a link back to the organizer.
Event Website
Other than this one? You might link to the venue’s page for this event.
Event Cost
They give multiple options for currency type, but if you just write the cost in the cost field $10 or whatever you want and leave the rest blank it will show $10 on the event page.
These fields would have little or no effect on how your event is viewed on the page, you can safely ignore these.
More options on right hand menus
Tags: you can add tags that might make your event more easy to find via a search engine. examples: city name, music genre, venue, etc.
Event Categories: You can add categories to your events a page is automatically generated for each category and a list of all the events with that categories selected will appear. More than one category can be chosen for an event.
Event Options:
Hide event (make sure no one can see all that hard work you just did)
Sticky in Month View (event will be listed first for that day in month view if multiple events on that day)
Event Status( cancel or postpone and event)
This post was written based off an installation of WordPress v6.1.1 using the theme Go v1.8.0 With the Plugin The Events Calendar Version 6.0.11.
The Go theme by GoDaddy makes adding social media links in your footer a breeze, It also allows you to match the icon colors with your sites color pallet for a pleasing look. But one feature that is missing is icon size. A client recently asked me to make those icons bigger, and this is what I came up with.
I’ll explain later how you might apply this to other themes if this doesn’t work for you.
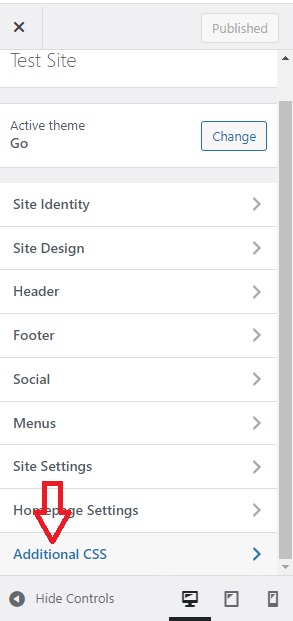
From your dashboard go to Appearance>Customize. Once you’re there scroll all the way down on the lefthand side menu and click Additonal CSS
Then just add this snippet of code in the space provided:
.social-icons__icon svg {
    transform:  scale(2);
 }//Change the 2 to adjust the size, this is 2 times as big, can do smaller too like 0.5
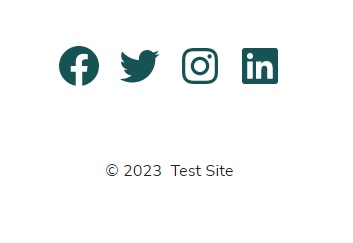
Don’t forget to hit Publish, and that’s it! Now your icons should be twice as big or whatever you set it too.
Warning: if you make the icons too large they will merge together, 2x should work fine if you haven’t added too many social links. Double check for mobile devices.
Now I’ll explain how I got there, you might be able to use this method for another theme.
I’m using Google Chrome for my browser, this might work in other browsers, but my explanation will be based on Chrome.
While viewing your site (your actual site not your admin section) right click on the icon or whatever element you are interested in and click inspect.
A screen should pop up with some code in it.
This is all the code for displaying your current page. It should come up near where you clicked inspect, but you can zero in farther by clicking on the icon indicated by the red arrow, then hovering over the page. The correlating section will be highlighted.
The section under line in green is the link to facebook <a href=”…> </a> is html for a link. If you’re familiar with this, please bear with me. class=”social-icons__icon” is the css instruction on how that section should be displayed. This is the part we’ll be taking advantage of.
The blue section <svg> is a scalable vector image, that’s your icon. The viewBox attribute is how the icon is sized. We might be able to find somewhere in the files on your server where this is stored, but if we make changes they’ll probably be overwritten during the next update.
However since the <svg> tag is nested inside the <a> tag, we’ll just hijack the css class social-icons__icon and tell it to scale any svg elements inside to whatever scaling we’d like.
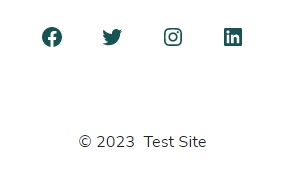
Before
After
This post was written based off an installation of WordPress v6.1.1 using the theme Go v1.8.0 With the Plugin CoBlocks v2.25.5. At the time of this post this is the default WordPress installation on a GoDaddy server.